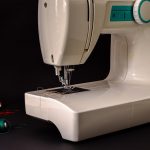
An ironing board is an essential tool for anyone who enjoys sewing as more often than not your projects will involve pressing down a seam or two. It is just as important to look after it as it is your sewing machine. Ironing board covers become tired over time, with burn marks, stains and general wear from use. Why not make another one exactly as you like with your chosen material? Follow the instructions to make your very own ironing board cover.
You will need:
- Material, depending on the size of your ironing board but approximately 1.5m in length and 0.5m for the width. This must be 100% cotton material. If you have your old ironing board cover this could be used to help with the measurements. If you are using a brand new piece of material, ensure that it is washed before you use it for your ironing board cover as the colours from your material can transfer onto items you are ironing.
- Around half a metre of insul-bright insulating fabric
- Around half a metre of polar fleece (if you wish – this is not necessary but is a good idea as it will stop the metal mesh of the board from marking and wearing the top piece of fabric).
- A piece of fold over elastic roughly 2.5m long with 25mm thickness
- A walking foot, wonder clips and 505 spray can be used to help make the job easier. If you don’t have wonder clips basic pins work just as well.
How to make
- Remove your old ironing board cover. Check that the foam padding is in good conditions as it might be worth replacing that while you have your cover off. Your old ironing board cover can be used to help with dimensions once elastic or cord has been removed. It is a useful template for your new cover.
- Place the ironing board you wish to cover face down on the material you wish to use. You could also draw around your old ironing board cover, ensuring you remove the elastic or string so that it is loose. Draw around your old cover or board onto the new fabric, allowing roughly 8 cm extra for the fabric to be placed underneath the board if you are just drawing around the board rather than the material.
- Next you need to cut out the fabric, following the line you drew carefully. It is best to use a sharp pair of scissors for this. You need to do the same for the other layers of material.
- If you are going to use a polar fleece, use a temporary fabric spray adhesive between each of the layers of fabric. This will help to stop it moving around when you are sewing. After adhering the fleece layer to the others, trim the edges of all the layers to ensure that they are all even.
- Pin the layers together or use wonder clips as they work really well when sewing layers together.
- Sew the fold over elastic to the edge. The easiest way to do this is to fold the elastic in half then put the layers in the middle of the elastic, ensuring the edges of the fabric are at the half way fold of the elastic. Use a 3 step zig-zag stitch position on your sewing machine. Sew just a few stitches to begin with to secure it then leaving the needle in the down position, pull the elastic as taught as you can. Sew all the layers together, ensuring that the edges of the fabric are butted up to the mid point fold in the fold over elastic so that it looks nice and neat.
- Finally sew the elastic all the way round the fabric. Where the ends meet together simply over sew to allow the two ends of fabric to over lap. Your ironing board cover should have a gather where the elastic pulls the fabric in so that it can fit your ironing board perfectly and it can also be removed when you need to wash your cover.
- Now you’re ironing board cover is done, simply attach it to your ironing board and press it with your iron.
You are now ready to use it, enjoy!
